How to use API Client Signer?
The API Client Signer allows you to programmatically create and sign transactions and also manage the underlying cryptographic keys directly. For more details, refer here.
To use the Signing API, it necessitates clients to set up a Client Signer. Follow the steps below to set up the API Client Signer:
-
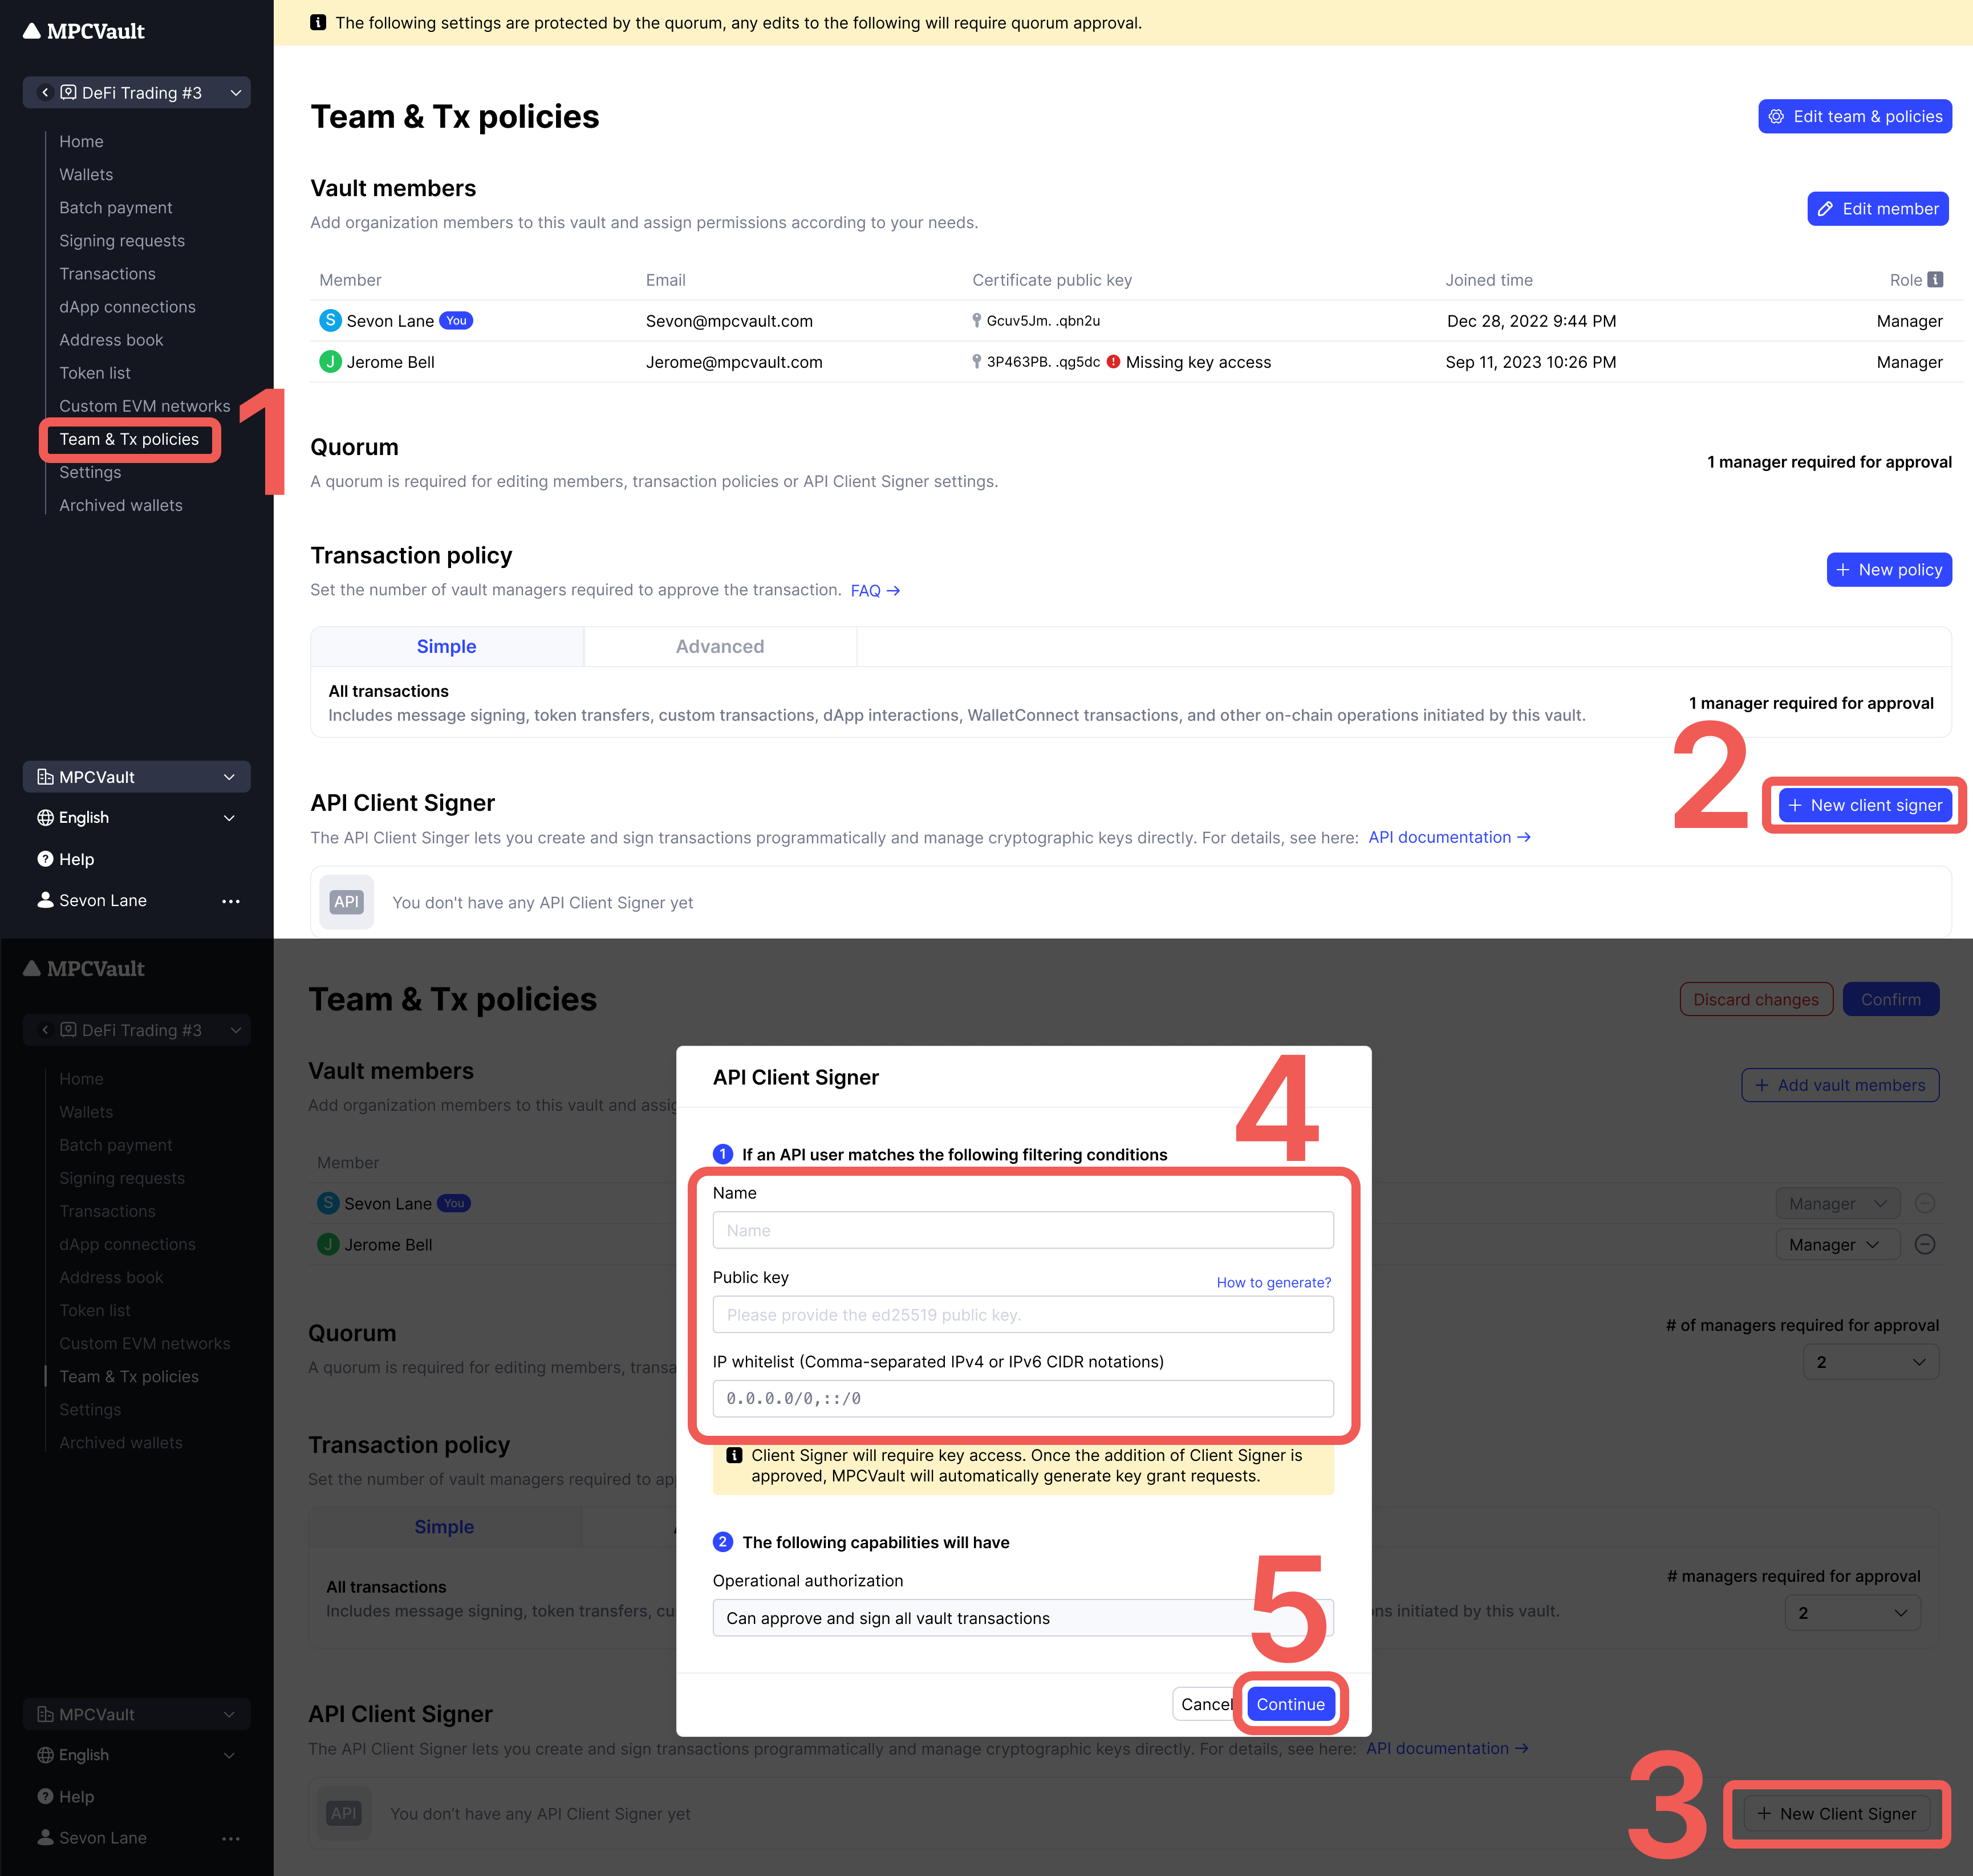
The vault manager navigates to the vault's "Team & Tx policies" page and clicks "+ New Client Signer" to enter the editing state.
-
Find and click "+ New Client Signer" to add it.
-
Enter the required information and click the "Continue" button.
-
Name: Enter a unique name to identify the API Client signer. Note that once the name is set, it cannot be changed.
-
Public key: Refer here to generate public key. Note that you cannot use the same api key twice or reuse deleted ones.
-
IP Whitelist: Complete this field to restrict API user access to only specific IP address ranges. You can enter up to 3 IP addresses. Please separate multiple addresses with commas.
-
-
After the pop-up window closes, click on the "Confirm" button in the bottom right corner to submit the "Vault setting update" signing request.
-
Go to MPCVault app to approve this request.

After completing the above steps, the API Client Signer will also require key access. A "Grant key access" signing request will be automatically generated. Please handle this request promptly in the MPCVault app. Once authorized successfully, the API Client Signer will be available.
The same API Client Signer cannot be used across different vaults. If you need to use it in multiple vaults, please add different API Client Signers for each vault.