Client Signer
Setup
The API Client Signer enables you to programmatically complete signing requests and also manage the underlying cryptographic keys directly.
Firstly, you need to generate an ed25519 key pair locally on your computer. Once the key is generated, you can utilize it to create a client signer in your vault on MPCVault.
- Open your terminal.
- Paste the following text, replacing the key name:
ssh-keygen -t ed25519 -C "[key_name]" - Choose a location to save the public and private keys.
- Do not set a password when prompted.
- Keep secure the private key. You will need it when configuring the client signer.
- Locate the generated public key file (typically ending in
.pub). Copy the content of the public key. It should look like this:ssh-ed25519 AAAAC3NzaC1lZDI1NTE5AAAAIK0wmN/Cr3JXqmLW7u+g9pTh+wyqDHpSQEIQczXkVx9q [key_name]
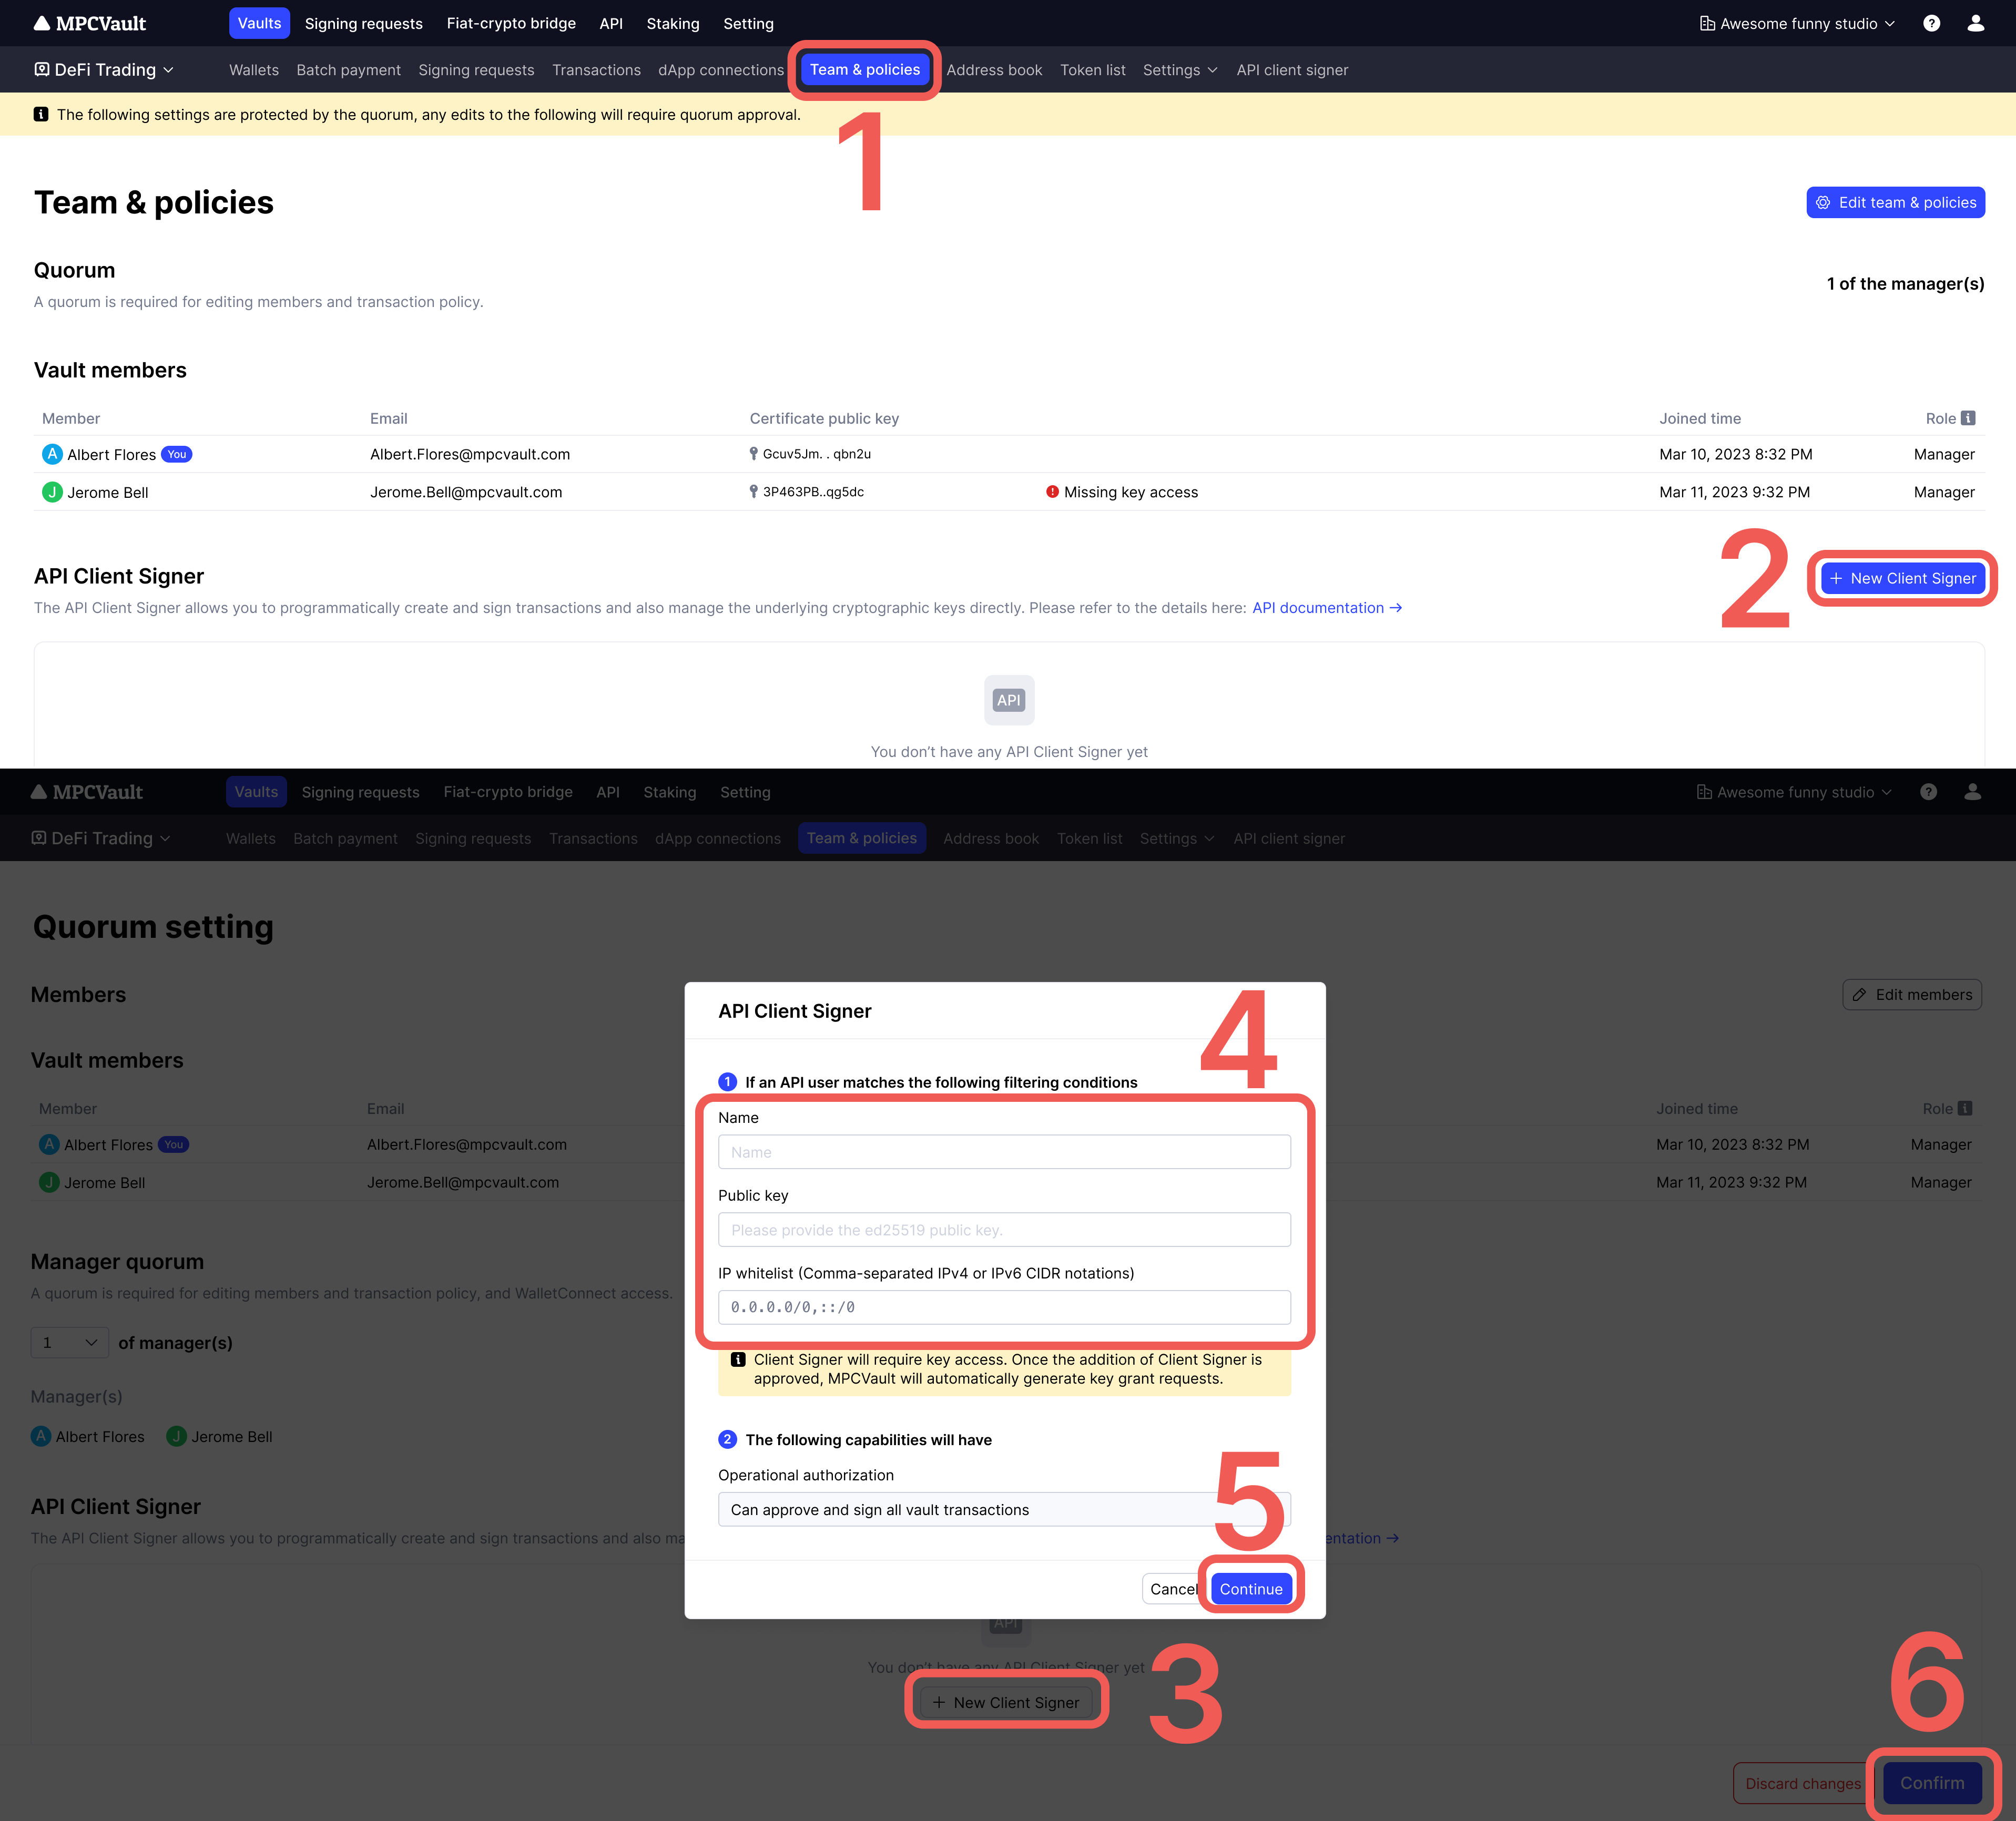
Next, follow the steps below to create a Client Signer in your vault:
-
The vault manager navigates to the vault's " Team & policies " page and clicks " +New Client Signer " to enter the editing state.
-
Find and click " +New Client Signer " to add it.
-
Enter the required information and click the " Continue " button.
-
After the pop-up window closes, click on the "Confirm" button in the bottom right corner to submit the "Vault setting update" signing request.
-
Go to the APP to approve this request.
After completing the above steps, the API Client Signer will also require key access. A " Grant key access " signing request will be automatically generated. Please handle this request promptly in the MPCVault app. Once authorized successfully, the API Client Signer will be available.
The same API Client Signer cannot be used across different vaults. If you need to use it in multiple vaults, please add different API Client Signers for each vault.
Detailed setup guide
A more detailed setup guide can be found here:
https://docs.google.com/document/d/1MF6aQUnLQ8h9Wpxct7HYC2w5g63oU-axpOVJwHQhDos/edit?usp=sharing