Skip this page if you only need manual transaction approval via the MPCVault app. The client signer is only required for automated signing.
- Maintains a secure connection to MPCVault
- Receives signing callbacks when you call
ExecuteSigningRequests - Approves transactions based on your callback server’s response
Prerequisites
- Docker (or Docker Compose) installed
- A server with a stable internet connection
- A callback endpoint on your backend to receive and approve signing requests
- An API user already created
Step 1: Generate an Ed25519 Key Pair
The client signer authenticates with MPCVault using an Ed25519 key pair. Generate one locally:No password: The key must not have a passphrase for the client signer to use it automatically.
Step 2: Register the Client Signer in Your Vault
- Go to console.mpcvault.com
- Navigate to your vault’s Team & policies page
- Click + New Client Signer
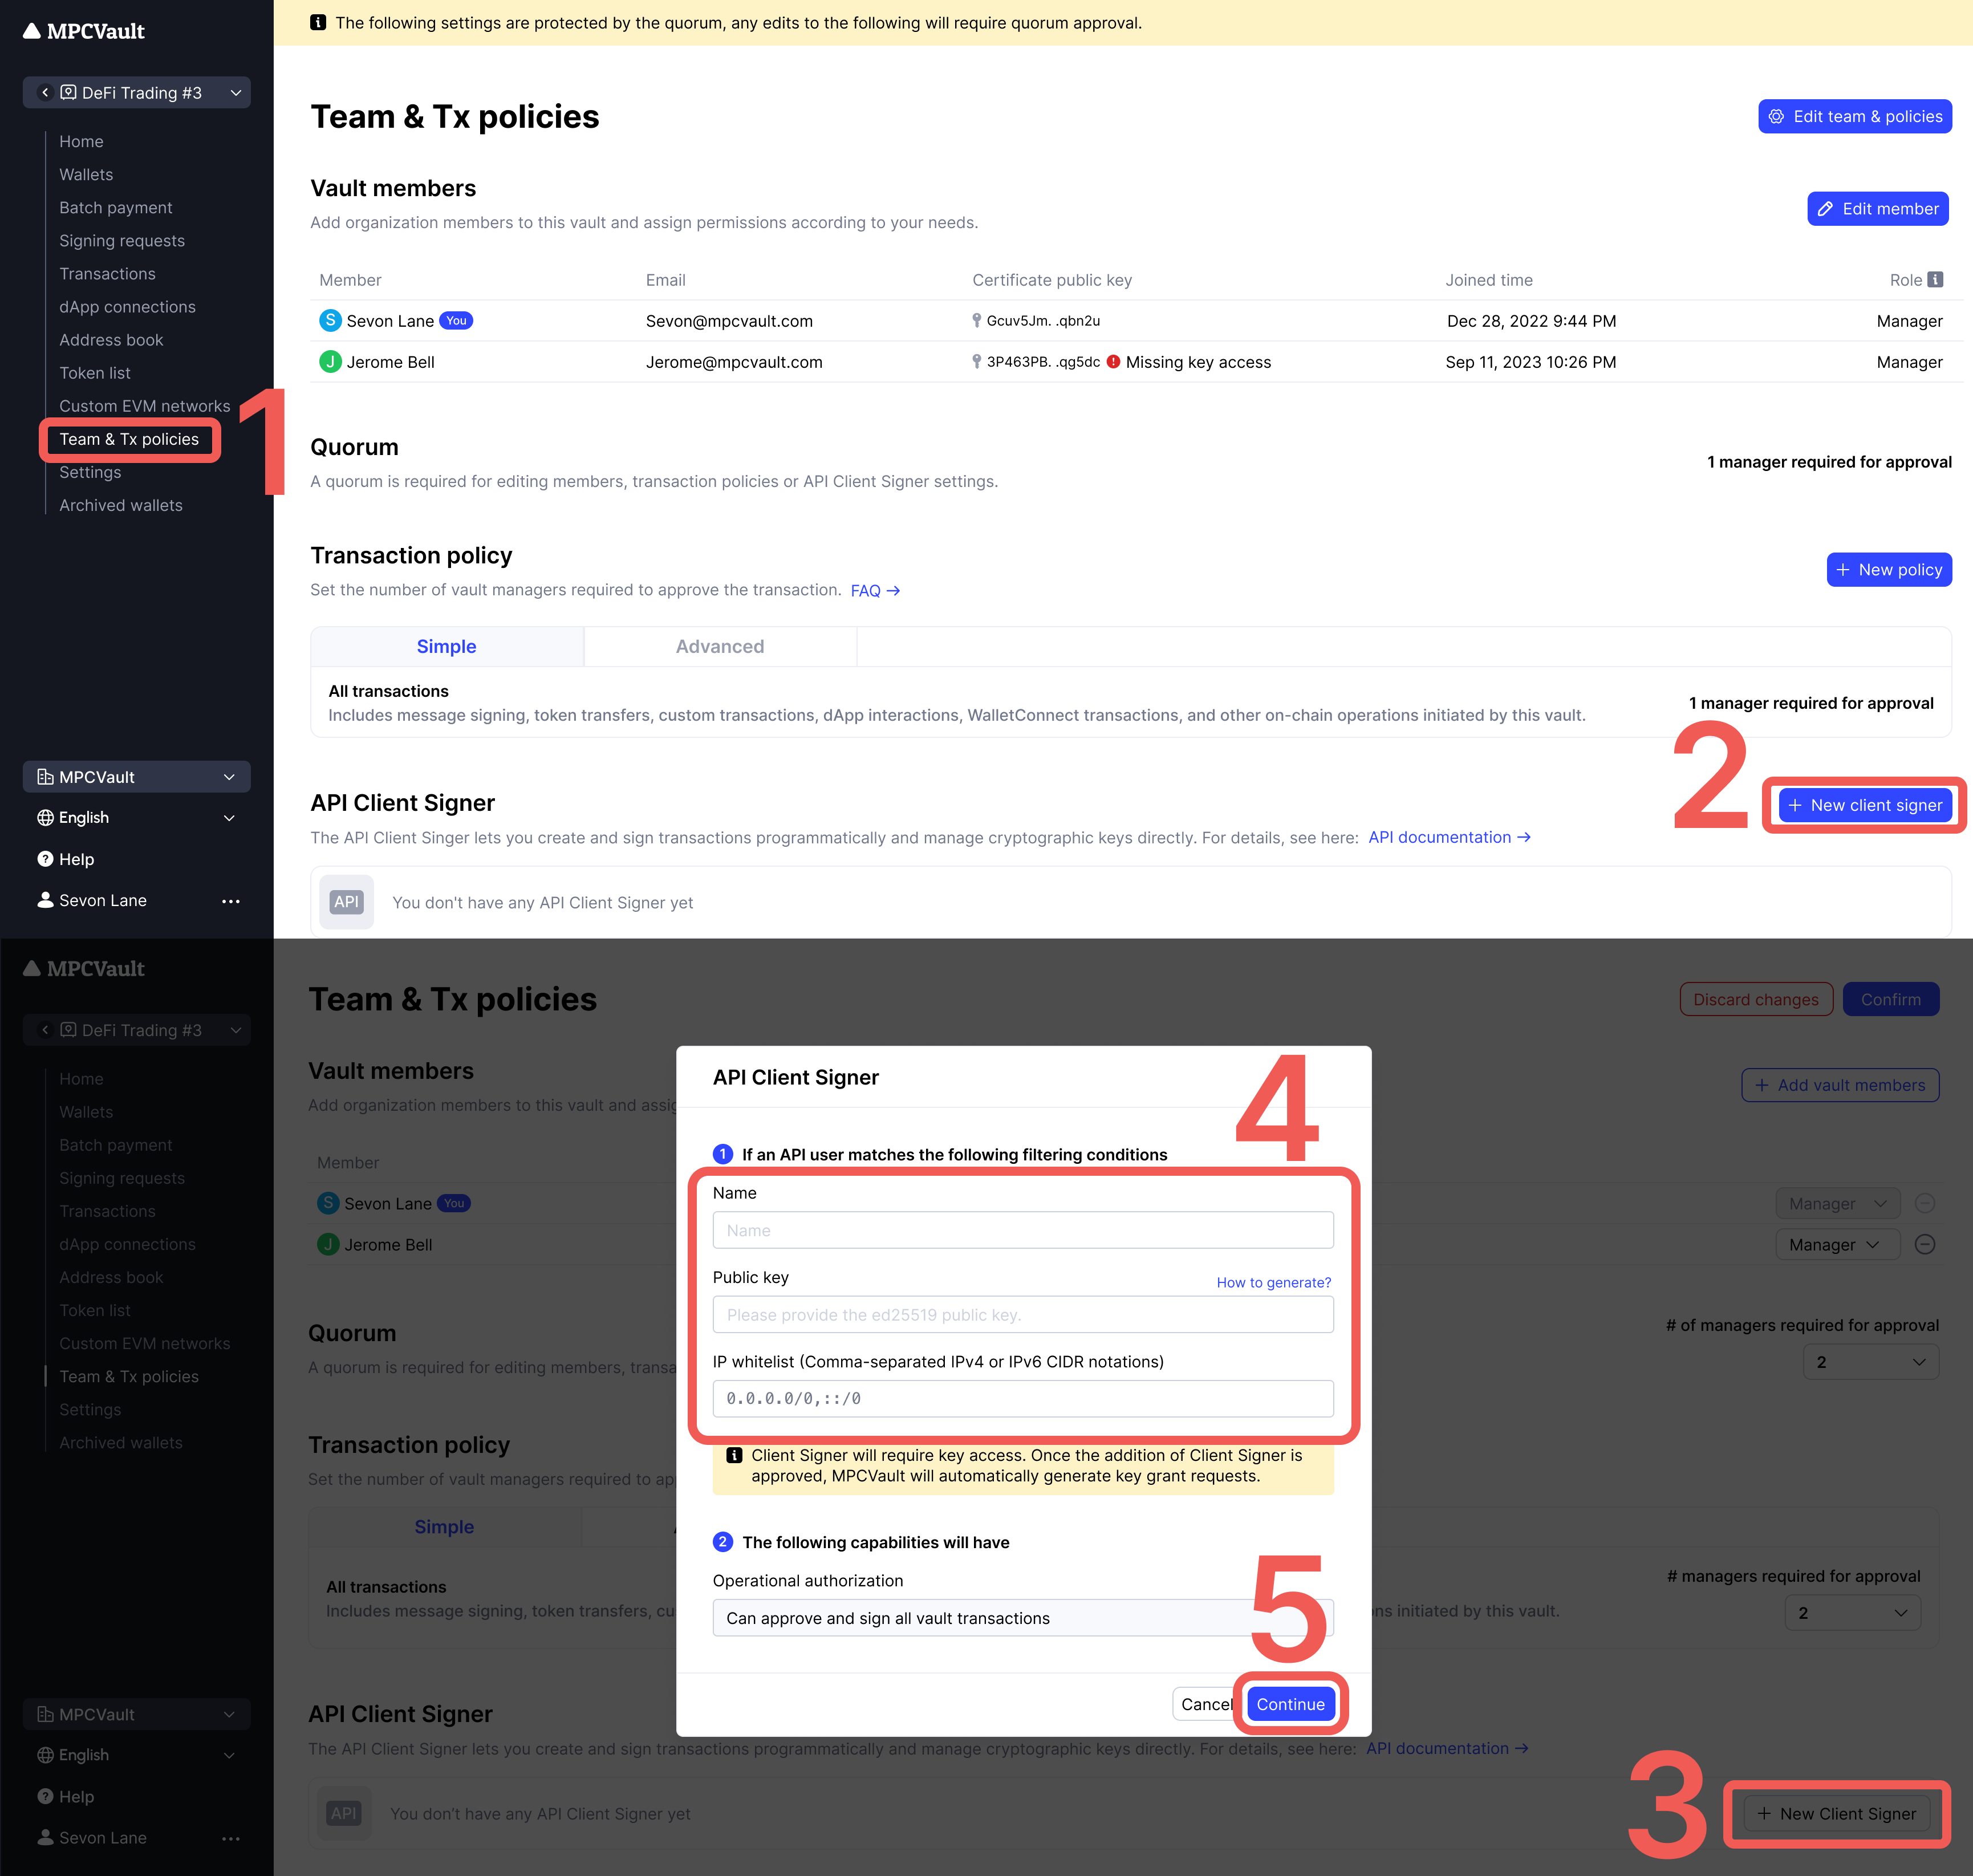
- Enter the information:
- Click Continue → Confirm to create a signing request
- Approve the Vault setting update request in the MPCVault app
Step 3: Grant Key Access
After creating the client signer, MPCVault automatically creates a Key grant access signing request. This grants the client signer permission to participate in MPC signing. Approve this request in the MPCVault app to complete setup.Step 4: Create the Configuration File
Createconfig.yml with your settings:
Step 5: Run the Client Signer
Option A: Docker Run (Development)
Option B: Docker Compose (Recommended for Production)
Createdocker-compose.yml:
Verify it’s running
Docker image: ghcr.io/mpcvault/client-signer
Step 6: Implement Your Callback Handler
When you callExecuteSigningRequests, MPCVault sends a callback to your callback-url. Your server must:
- Receive the callback (POST request with protobuf body)
- Validate the signing request against your business rules
- Return HTTP 200 to approve, or 4xx/5xx to reject
Docker Networking
host.docker.internal is a special DNS name that resolves to the host machine from inside a Docker container. It works on Docker Desktop (Mac/Windows) and recent Docker Engine versions on Linux.How Signing Works
When you callExecuteSigningRequests: